Appearance
Using MVC
We can already use Koa to handle different URLs and Nunjucks to render templates. Now, it’s time to combine the two!
When a user requests a URL through their browser, Koa calls an asynchronous function to handle that URL. Inside this asynchronous function, we use one line of code:
javascript
ctx.render('home.html', { name: 'Michael' });This line uses Nunjucks to render data with the specified template into HTML, which is then sent to the browser, allowing the user to see the rendered page:
             ┌─────────────────────────────┐
HTTP Request │GET /Bob                     │
             └─────────────────────────────┘
                            │
                            │ name = Bob
                            ▼
             ┌─────────────────────────────┐
     app.mjs │GET /:name                   │
             │async (ctx, next) {          │
             │    ctx.render('home.html', {│
             │        name: ctx.params.name│
             │    });                      │
             │}                            │
             └─────────────────────────────┘
                            │
                            │ {{ name }} ─▶ Bob
                            ▼
             ┌─────────────────────────────┐
    Template │<html>                       │
             │<body>                       │
             │    <p>Hello, {{ name }}!</p>│
             │</body>                      │
             │</html>                      │
             └─────────────────────────────┘
                            │
                            │ Output
                            ▼
             ┌─────────────────────────────┐
        HTML │<html>                       │
             │<body>                       │
             │    <p>Hello, Bob!</p>       │
             │</body>                      │
             │</html>                      │
             └─────────────────────────────┘
This is the legendary MVC: Model-View-Controller.
The asynchronous function is the C: Controller, which is responsible for business logic, such as checking if a username exists and retrieving user information, etc.
The template containing the variable is the V: View, which is responsible for display logic. By simply replacing some variables, the View outputs the HTML that the user sees.
Where is the Model in MVC? The Model is used to pass data to the View, so that when the View replaces variables, it can retrieve the corresponding data from the Model.
In the example above, the Model is a JavaScript object:
javascript
{ name: 'Bob' }Next, we will create the view-koa project based on the original url2-koa, integrating Koa2 and Nunjucks, and changing the direct string output method to ctx.render(view, model).
The project structure for koa-mvc is as follows:
koa-mvc/
├── app.mjs
├── controller
│   ├── index.mjs
│   └── signin.mjs
├── controller.mjs
├── package-lock.json
├── package.json
├── static/  <-- Static resource files
│   ├── bootstrap.css
│   └── favicon.ico
├── view/  <-- HTML template files
│   ├── base.html
│   ├── index.html
│   ├── signin-failed.html
│   └── signin-ok.html
└── view.mjs
In package.json, the dependencies we will use are:
json
"@koa/bodyparser": "^5.1.1",
"@koa/router": "^12.0.1",
"koa": "^2.15.3",
"koa-mount": "^4.0.0",
"koa-static": "^5.0.0",
"nunjucks": "^3.2.4"
First, install the dependencies using npm install, and then we prepare to write the following two Controllers:
Handling the Home Page GET /
We define an asynchronous function to handle the home page URL /:
javascript
async function index(ctx, next) {
    ctx.render('index.html', {
        title: 'Welcome'
    });
}
Note that Koa does not provide a render method on the ctx object, so we assume it should be used like this. In this way, when we write the Controller, the last step calling ctx.render(view, model) completes the page output.
Handling Login Requests POST /signin
We define another asynchronous function to handle login requests to /signin:
javascript
async function signin(ctx, next) {
    let email = ctx.request.body.email || '';
    let password = ctx.request.body.password || '';
    if (email === 'admin@example.com' && password === '123456') {
        console.log('signin ok!');
        ctx.render('signin-ok.html', {
            title: 'Sign In OK',
            name: 'Mr Bob'
        });
    } else {
        console.log('signin failed!');
        ctx.render('signin-failed.html', {
            title: 'Sign In Failed'
        });
    }
}
Since the login request is a POST, we retrieve the POST request data using ctx.request.body.<name>, providing a default value.
When the login is successful, we render signin-ok.html, and when it fails, we render signin-failed.html. Thus, we need the following three Views:
index.htmlsignin-ok.htmlsignin-failed.html
Writing Views
When writing Views, we are actually writing HTML pages. To make the pages look good, it is essential to use an existing CSS framework. We will use the Bootstrap CSS framework. After downloading the ZIP package from the homepage, we place all static resource files in the /static directory so that we can use Bootstrap's CSS directly when writing HTML, like this:
html
<link rel="stylesheet" href="/static/bootstrap.css">Now, before using MVC, the first question arises: how to handle static files?
We put all static resource files into the /static directory to handle static files uniformly. In Koa, we need to write a middleware to handle URLs that start with /static/.
If we don’t want to write our own middleware to handle static files, we can directly use the combination of koa-mount and koa-static to handle static files:
javascript
// Handle static files:
app.use(mount('/static', serve('static')));
The above code is roughly equivalent to writing a middleware by hand:
javascript
app.use(async (ctx, next) => {
    // Check if the URL starts with the specified prefix:
    if (ctx.request.path.startsWith('/static/')) {
        // Get the complete file path:
        let fp = ctx.request.path;
        if (await fs.exists(ctx.request.path)) {
            // Set mime type based on extension:
            ctx.response.type = lookupMime(ctx.request.path);
            // Read the file content and assign it to response.body:
            ctx.response.body = await fs.readFile(fp);
        } else {
            // File not found:
            ctx.response.status = 404;
        }
    } else {
        // Not the specified prefix URL, continue to the next middleware:
        await next();
    }
});
Integrating Nunjucks
Integrating Nunjucks is actually writing a middleware that binds a render(view, model) method to the ctx object, allowing subsequent Controllers to call this method to render templates.
We create a view.mjs to implement this middleware:
javascript
import nunjucks from 'nunjucks';

function createEnv(path, { autoescape = true, noCache = false, watch = false, throwOnUndefined = false }, filters = {}) {
    ...
    return env;
}

const env = createEnv('view', {
    noCache: process.env.NODE_ENV !== 'production'
});

// Export the env object:
export default env;
When using it, we add the following code to app.mjs:
javascript
import templateEngine from './view.mjs';

// app.context is the prototype of the ctx created for each request,
// so we bind the render() method to the prototype object:
app.context.render = function (view, model) {
    this.response.type = 'text/html; charset=utf-8';
    this.response.body = templateEngine.render(view, Object.assign({}, this.state || {}, model || {}));
};
Note that the createEnv() function is identical to the one written when using Nunjucks earlier.
Here, we check whether the current environment is production. If it is, we use caching; if not, we disable caching. In the development environment, disabling caching allows us to see the changes in the View immediately after refreshing the browser; otherwise, we would need to restart the Node program every time we make a modification, which greatly reduces development efficiency.
Node.js defines an environment variable env.NODE_ENV in the global variable process. Why use this environment variable? Because in development, it should be set to 'development', while on the server, it should be set to 'production'. When writing code, we need to make different judgments based on the current environment.
Note: The environment variable NODE_ENV must be configured as 'production' in the production environment, while it is not required in the development environment. In fact, NODE_ENV may be undefined, so when judging, do not use NODE_ENV === 'development'.
Similarly, when using the middleware written above to handle static files, we can also judge based on the environment variable:
javascript
if (!isProduction) {
    app.use(mount('/static',

 serve('static')));
}
This is because, in the production environment, static files are handled by a reverse proxy server (like Nginx) deployed at the front, and the Node program does not need to handle static files. In the development environment, we want Koa to handle static files as well; otherwise, we would need to manually configure a reverse proxy server, complicating the development environment.
Writing Views
When writing Views, it is very necessary to first write a base.html as a skeleton, from which other templates inherit. This way, we can greatly reduce repetitive work.
Writing HTML is not the focus of this tutorial. Here, we refer to Bootstrap's official website to write a simple base.html.
Running
If all goes well, this koa-mvc project should run smoothly. Before running, let’s check the order of middleware in app.mjs:
The first middleware records the URL and the execution time of the page:
javascript
app.use(async (ctx, next) => {
    console.log(`Process ${ctx.request.method} ${ctx.request.url}...`);
    const start = Date.now();
    await next();
    const execTime = Date.now() - start;
    ctx.response.set('X-Response-Time', `${execTime}ms`);
});
The second middleware handles static files:
javascript
if (!isProduction) {
    app.use(mount('/static', serve('static')));
}
The third middleware parses POST requests:
javascript
app.use(bodyParser());The last middleware handles URL routing:
javascript
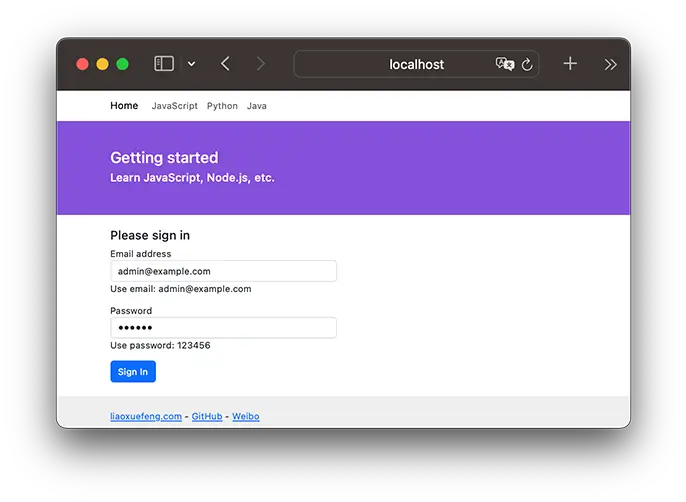
app.use(await controller());Now, run the code with node app.mjs, and if there are no issues, entering localhost:3000/ in the browser should display the home page content:

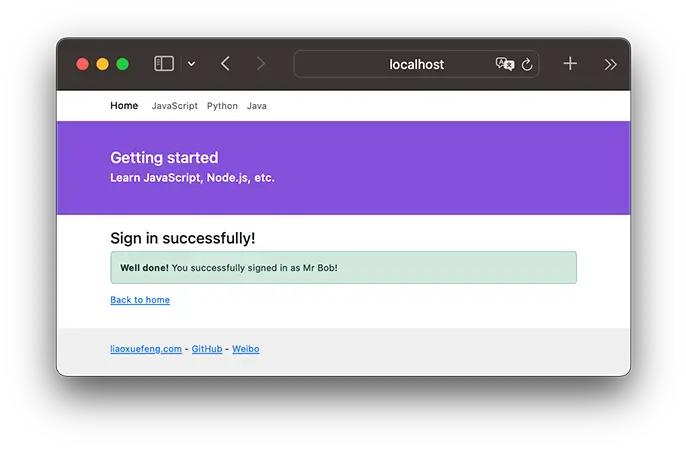
Directly on the home page, if the correct Email and Password are entered, it should lead to the login success page:

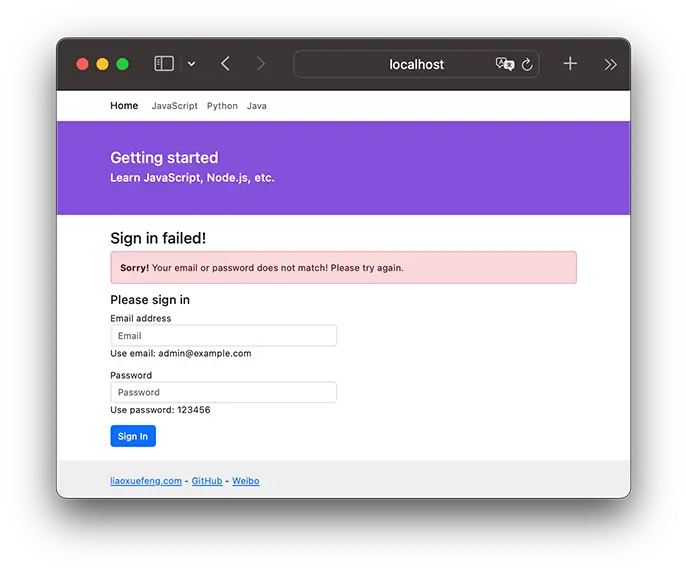
If the entered Email and Password are incorrect, it should lead to the login failure page:

How do we determine the correct Email and Password? Currently, in signin.js, we check like this:
javascript
if (email === 'admin@example.com' && password === '123456') {
    ...
}
Of course, a real website would check the Email and Password against a database, which requires discussing how Node.js interacts with databases later.
To start the app in production mode, the environment variable must be set, which can be done with the following command:
bash
$ NODE_ENV=production node app.mjsThis way, template caching will take effect, and static file requests will no longer be responded to.
Extensions
Notice that the ctx.render internally renders the template with the Model object not being the passed model variable, but rather:
javascript
Object.assign({}, ctx.state || {}, model || {})This little trick is for extending purposes.
First, model || {} ensures that even if undefined is passed, model will default to {}. Object.assign() copies all properties from the other parameters to the first parameter, where the second parameter is ctx.state || {}. This is to allow some common variables to be placed in ctx.state and passed to the View.
For example, a middleware responsible for checking user permissions can place the current user in ctx.state:
javascript
app.use(async (ctx, next) => {
    var user = tryGetUserFromCookie(ctx.request);
    if (user) {
        ctx.state.user = user;
        await next();
    } else {
        ctx.response.status = 403;
    }
});
This way, it is unnecessary to include the user variable in the model in every Controller's asynchronous function.